3D printing enthusiasts know that achieving high-quality prints requires more than simply loading a model and pressing print. While default profiles in Creality Print work well for beginners, advanced users can unlock better print quality, stronger parts, and faster printing times by adjusting advanced parameters. Understanding and optimizing creality print advanced settings allows users to fine-tune every aspect of the printing process according to their specific needs.
Whether you are creating detailed miniatures, functional prototypes, or durable mechanical parts, learning how to modify advanced settings can significantly improve your results. This guide explores expert tips for mastering creality print advanced settings and achieving professional-grade 3D prints.
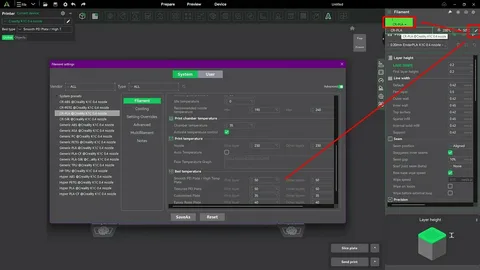
Understanding the Importance of Creality Print Advanced Settings
Many users rely on standard slicing profiles because they provide reliable results for everyday printing. However, every filament type, model design, and printer setup behaves differently. Advanced settings give users greater control over print quality, material usage, speed, and overall performance.
By adjusting creality print advanced settings, users can solve common printing issues such as stringing, poor layer adhesion, rough surfaces, and dimensional inaccuracies. These settings help customize the printer’s behavior to match specific project requirements, resulting in improved consistency and better-looking prints.
Advanced settings also allow users to optimize prints for unique goals. For example, a decorative model may require extremely fine layer heights and slow print speeds, while a functional part may benefit from thicker layers and increased wall strength. Learning how these settings interact is essential for achieving the desired outcome.
Rather than depending entirely on default presets, experienced users use advanced controls to maximize the capabilities of their Creality printers. Small adjustments often produce noticeable improvements in print quality and efficiency.
Optimizing Layer Height and Wall Settings
Layer height is one of the most influential settings in 3D printing. It directly affects print quality, detail level, and printing time. Lower layer heights produce smoother surfaces and finer details but increase printing duration. Higher layer heights speed up printing while sacrificing some visual quality.
Within creality print advanced settings, users can experiment with adaptive layer heights to balance quality and speed. For detailed models, a layer height of 0.12 mm or lower often provides excellent results. For larger functional prints, 0.2 mm to 0.28 mm may be sufficient while reducing print time considerably.
Wall settings are equally important when creating strong and durable parts. Increasing wall line count strengthens the outer shell and improves resistance to stress. Many users achieve better mechanical performance by increasing wall thickness rather than simply adding more infill.
Fine-tuning wall order and wall overlap settings can also improve surface appearance. Proper wall settings help eliminate gaps, enhance layer bonding, and produce cleaner edges. When optimized correctly, these adjustments contribute significantly to both strength and aesthetics.
Fine-Tuning Print Speed and Acceleration
Print speed directly impacts print quality. While faster speeds reduce production time, excessive speed often introduces defects such as ringing, ghosting, and poor layer adhesion. One of the most effective ways to improve print quality is carefully adjusting speed-related parameters.
In creality print advanced settings, users can customize outer wall speed, inner wall speed, infill speed, and travel speed independently. Slower outer wall speeds generally create smoother surfaces because the printer has more time to place filament accurately.
Acceleration and jerk settings play a major role in printer movement behavior. High acceleration values allow rapid movement changes but may introduce vibrations that affect print quality. Lower acceleration settings improve precision, especially for detailed models and intricate designs.
A balanced approach is often best. Moderate print speeds combined with carefully tuned acceleration settings help maintain quality without dramatically increasing print times. Testing different combinations allows users to identify the ideal settings for their specific printer and filament.
Improving Retraction and Cooling Performance
Stringing and oozing are common challenges in FDM 3D printing. Retraction settings help reduce these issues by pulling filament back into the nozzle during travel movements. Properly adjusted retraction settings can dramatically improve print cleanliness.
One of the most valuable creality print advanced settings involves optimizing retraction distance and retraction speed. Direct-drive extruders typically require shorter retraction distances, while Bowden setups often need longer values. Finding the correct balance prevents both stringing and under-extrusion.
Cooling settings are equally important for maintaining print quality. Effective part cooling helps filament solidify quickly, preserving sharp details and reducing deformation. PLA generally benefits from high cooling levels, while materials such as ABS and PETG often require reduced fan speeds.
Advanced users frequently adjust cooling based on layer time, model geometry, and filament type. Proper cooling minimizes sagging on overhangs, improves bridging performance, and enhances surface finish. Combining optimized retraction and cooling settings can significantly improve overall print appearance.
Adjusting Infill, Support, and Material Flow Settings
Infill settings determine the internal structure of a printed object. While many users focus solely on infill percentage, infill pattern selection also plays an important role. Different patterns offer varying levels of strength, flexibility, and material efficiency.
Within creality print advanced settings, users can experiment with patterns such as Gyroid, Cubic, and Grid. Gyroid infill is particularly popular because it provides excellent strength while maintaining efficient material usage. Adjusting infill overlap can further improve bonding between walls and internal structures.
Support settings deserve careful attention when printing complex models. Advanced support customization allows users to control support density, interface layers, support angles, and placement options. Proper support tuning reduces material consumption while making support removal easier.
Flow rate adjustments help ensure accurate filament extrusion. Over-extrusion can create blobs and rough surfaces, while under-extrusion leads to weak layers and visible gaps. Calibrating material flow settings for each filament type helps maintain dimensional accuracy and consistent print quality.
Using Advanced Calibration Techniques for Better Results
Successful 3D printing depends heavily on calibration. Even the most refined creality print advanced settings cannot compensate for a poorly calibrated printer. Regular calibration ensures that hardware and software work together effectively.
Temperature towers are useful tools for identifying the ideal nozzle temperature for specific filaments. Different brands and materials often require slightly different temperatures. Testing temperature variations helps optimize layer adhesion, surface finish, and stringing performance.
Flow calibration tests help determine accurate extrusion multipliers. Pressure advance and linear advance features, when supported, further improve print consistency by compensating for pressure changes inside the nozzle during movement.
Experienced users also perform calibration tests for retraction, dimensional accuracy, and bed leveling. These procedures provide valuable data that supports more informed adjustments within advanced settings. Consistent calibration creates a strong foundation for achieving professional-quality prints.
Conclusion
Mastering creality print advanced settings is one of the most effective ways to improve 3D printing results. By understanding and optimizing parameters such as layer height, wall thickness, print speed, retraction, cooling, infill, and material flow, users can achieve higher-quality prints tailored to their specific needs.
The key to success lies in systematic testing and gradual adjustments. Rather than changing multiple settings simultaneously, experienced users evaluate one variable at a time and document the results. With patience and experimentation, creality print advanced settings can help transform ordinary prints into professional-grade creations with superior strength, accuracy, and visual appeal.